Traverse Global v11.2
Prepare Payments
Use the Prepare Payments function to create a record of released invoices due to be paid.
To prepare a check for only one invoice, use the Change Invoice Status function and the Hold/Release Invoices function to determine which invoices are released for the vendor. Use the Hold/Release Invoices function to hold all invoices except the one you want to pay. Then use the Prepare Payments function and enter the vendor ID.
If you prepare a payment for an invoice that you do not want to pay, put the invoice on hold. Before you print or post payments, use the Select Payables function to drop the invoice from the payment run.

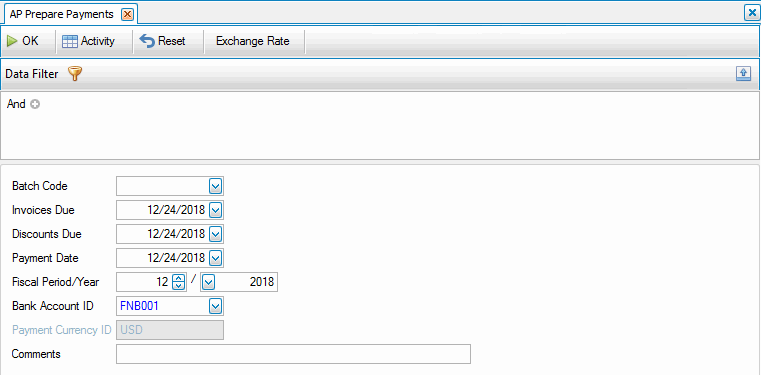
- Use the Data Filter to select the range of filtering options or leave the filter blank to include all available data.
- Select a batch code to represent the group of payments to prepare from the Batch Code field. This box will only be available when you selected Yes to the use batch processing in the business rules function.
Note: You can prepare more than one batch if needed, printing and posting each batch independently of the others. - Select a due date for the invoices from the Invoices Due field. All invoices with a due date on or prior to this date will be included in the prepare payments, for the range of vendors selected, and have a status of released.
Note: The date you enter determines which invoices to prepare. Payments are prepared for invoices with a net due date before or equal to the date entered in this field. Also, the system prepares invoices on which the discounts due date, stored in the Open Invoice table, is less than or equal to the Invoices Due date entered on the Prepare Payments screen, but greater than the Discounts Due date entered on the Prepare Payments screen. - Enter the Discounts Due date up to which to take discounts. Discounts are calculated for invoices with a discount due date after or equal to the entered discount due date.
- Select the date to print on the payments from the Payment Date field.
- Enter the fiscal period and year for which to post payments in the Fiscal Period/Year fields. The fiscal period and year will default to the period the payment date falls in.
- Select a bank account ID from the Bank Account ID field. Payments prepared in this check run are flagged with this bank account ID. To assign a bank ID to prepaid payments, see Online Checks or the Prepay section of the Hold/Release function.
Note: If you use multicurrency and you selected a foreign currency for which to prepare payments, the currency assigned to the bank account you select appears in the Payment Currency ID field. - The Exchange Rate button on the toolbar will open the Exchange Rate dialog box where you can view all possible combinations of active currencies, and edit exchange rate values if applicable.
Note: The default exchange rate is based on the assigned Payment Date. - Enter any applicable comments about the payment in the Comments field.
- Click a command button to
| Click | To |
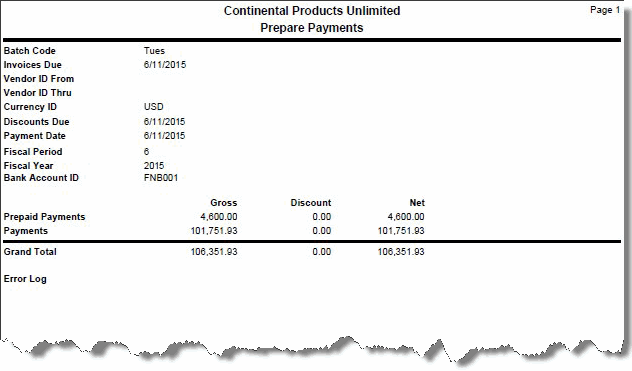
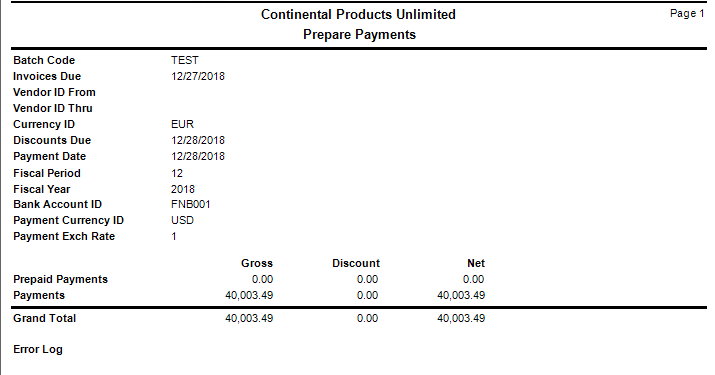
| OK | Begin preparing the payments. When processing is complete, a confirmation box appears. Then the Prepare Payments Report appears. |
| Activity | Open the Activity Log dialog box where you can view information about previous actions, including run time, user ID, and comments, as well as internal sequence numbers and run IDs. |
| Reset | Set all fields to their default values. |

Multi-currency
